
TABLE OF CONTENTS

Updated: 22 Apr 2025
NVIDIA A100 GPUs On-Demand

Meta has recently introduced Llama 3.1, an improved version of the Llama 3 model. For a step-by-step guide on getting started with Llama 3.1, check out our latest tutorial here!
Introduction
Llama 3 is the latest model of Meta built upon the success of its predecessors. Llama 3 offers enhanced performance, improved context understanding and more nuanced language generation capabilities. The "70B" is the approximate number of parameters in the model - 70 billion - which means Llama 3-70B deployment can be easily done on modern NVIDIA GPUs.
Why Deploy on Hyperstack?
Hyperstack is a cloud platform designed to accelerate AI and machine learning workloads. Here's why it's an excellent choice for deploying Llama 3-70B:
- Availability: Hyperstack provides access to the latest and most powerful GPUs such as the NVIDIA H100 on-demand, specifically designed to handle large language models.
- Ease of Deployment: With pre-configured environments and one-click deployments, setting up complex AI models becomes significantly simpler on our platform.
- Scalability: You can easily scale your resources up or down based on your computational needs.
- Cost-Effectiveness: You pay only for the resources you use with our cost-effective cloud GPU pricing.
- Integration Capabilities: Hyperstack provides easy integration with popular AI frameworks and tools.
Deployment Process
Now, let's walk through the step-by-step process of deploying Llama3-70B on Hyperstack.
Step 1: Accessing Hyperstack
- Go to the Hyperstack website and log in to your account.
- If you're new to Hyperstack, you'll need to create an account and set up your billing information. Check our documentation to get started with Hyperstack.
- Once logged in, you'll be greeted by the Hyperstack dashboard, which provides an overview of your resources and deployments.
Step 2: Deploying a New Virtual Machine
Initiate Deployment
- Look for a "Deploy" or "New Instance" button on the dashboard.
- Click it to start the deployment process.

Select Hardware Configuration
- For Llama 3-70B requirements, go into the hardware options and choose the "2xA100-80G-PCI" flavor.
- This configuration provides two NVIDIA A100 GPUs with 80GB memory each, connected via PCIe, offering exceptional performance for running Llama3-70B.

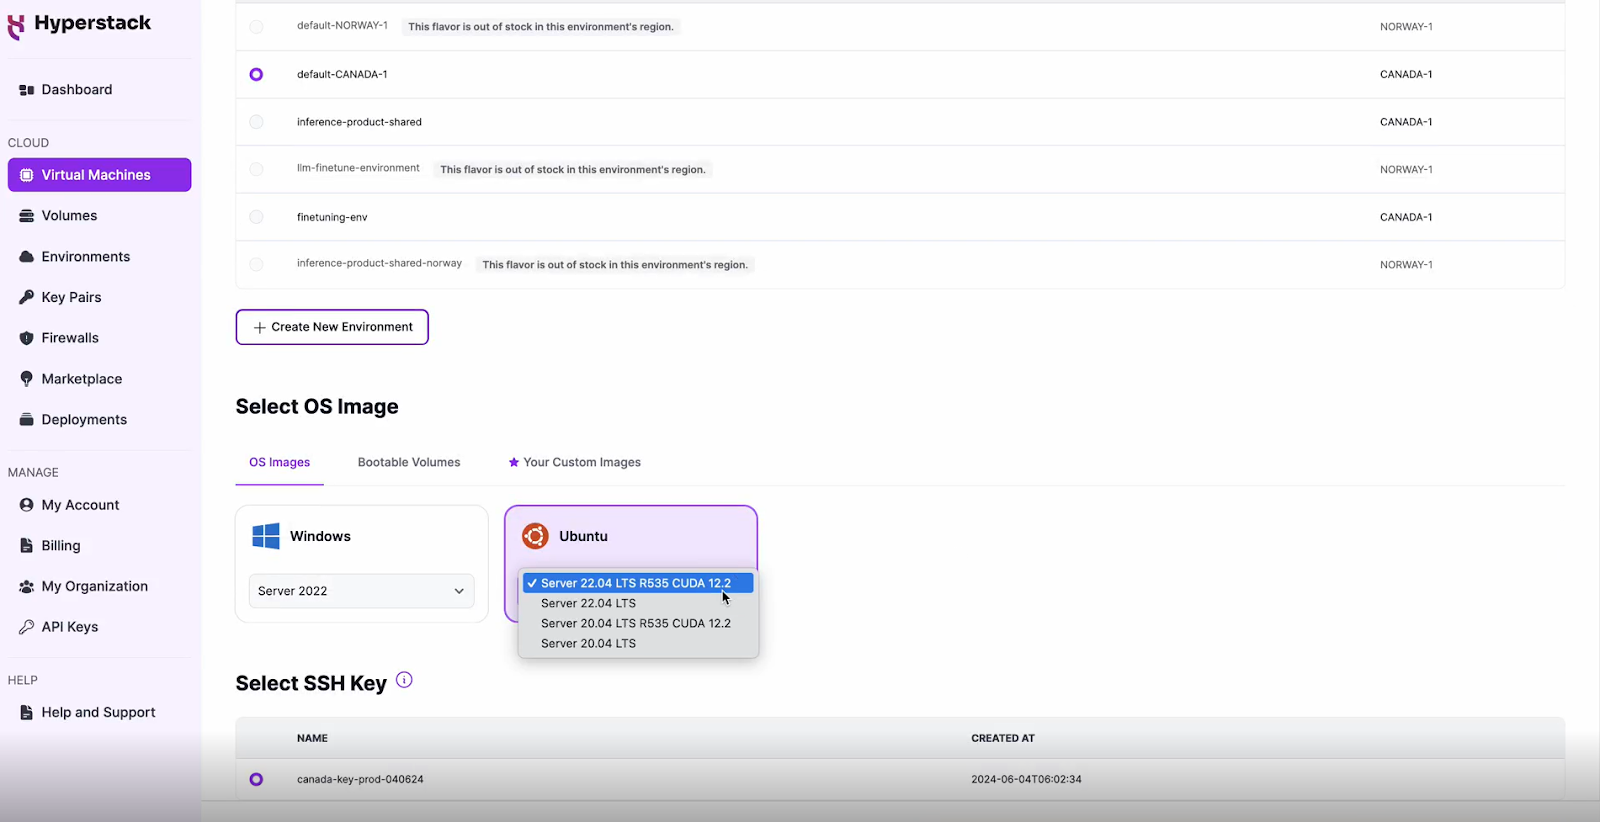
Choose the Operating System
- Select the "Server 22.04 LTS R535 CUDA 12.2".
- This image comes pre-installed with Ubuntu 22.04 LTS and NVIDIA drivers (R535) along with CUDA 12.2, providing an optimised environment for AI workloads.
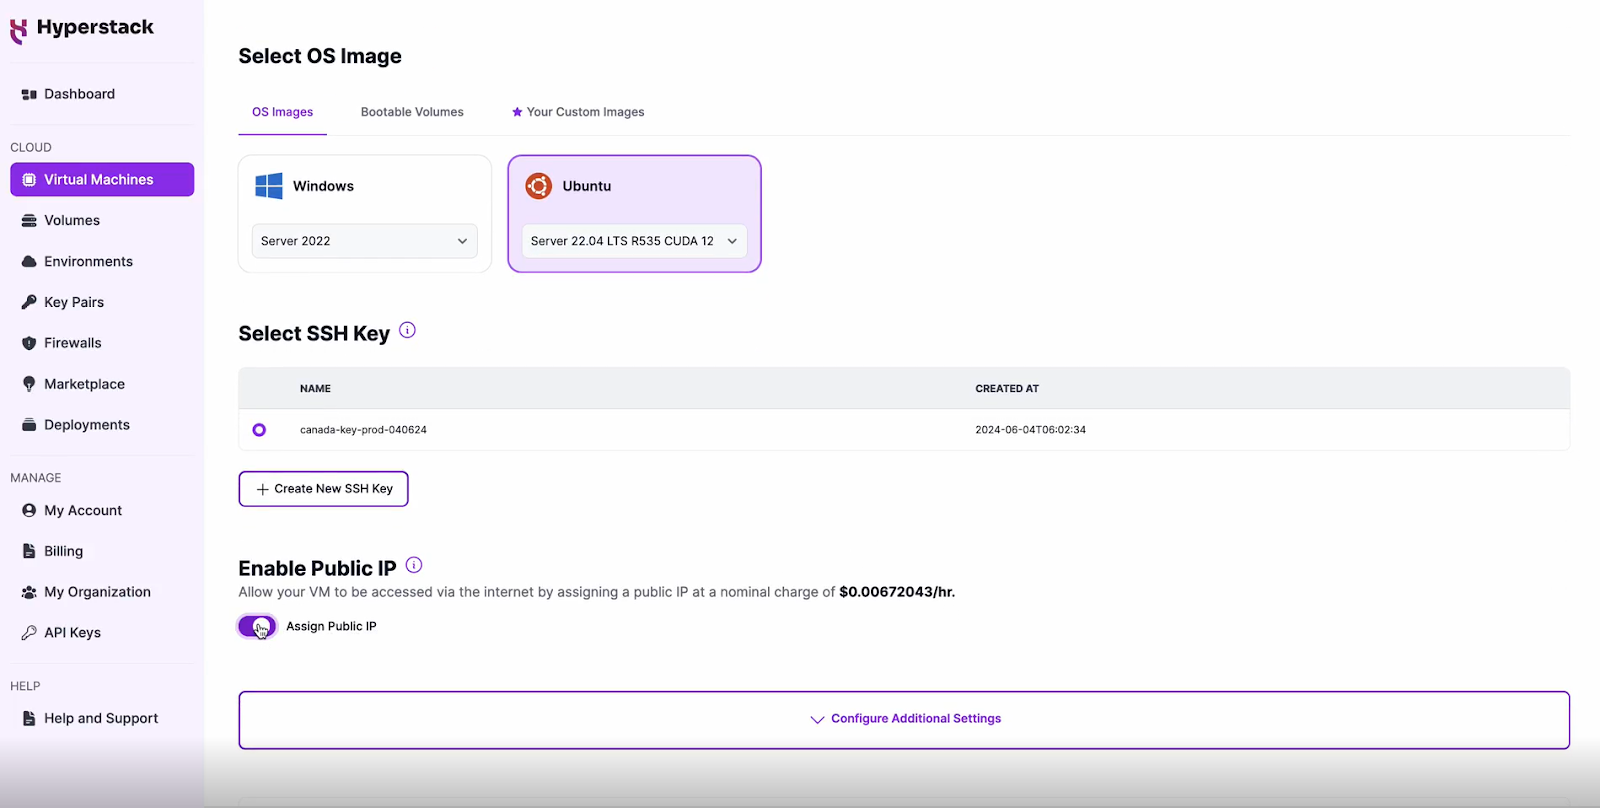
Select a keypair
- Select one of the keypairs in your account. Don't have a keypair yet? See our Getting Started tutorial for creating one.
Network Configuration
- Ensure you assign a Public IP to your instance.
- This allows you to access your VM from the internet, which is crucial for remote management and API access.
Enable SSH Access
- Make sure to enable an SSH connection.
- You'll need this to securely connect and manage your VM.
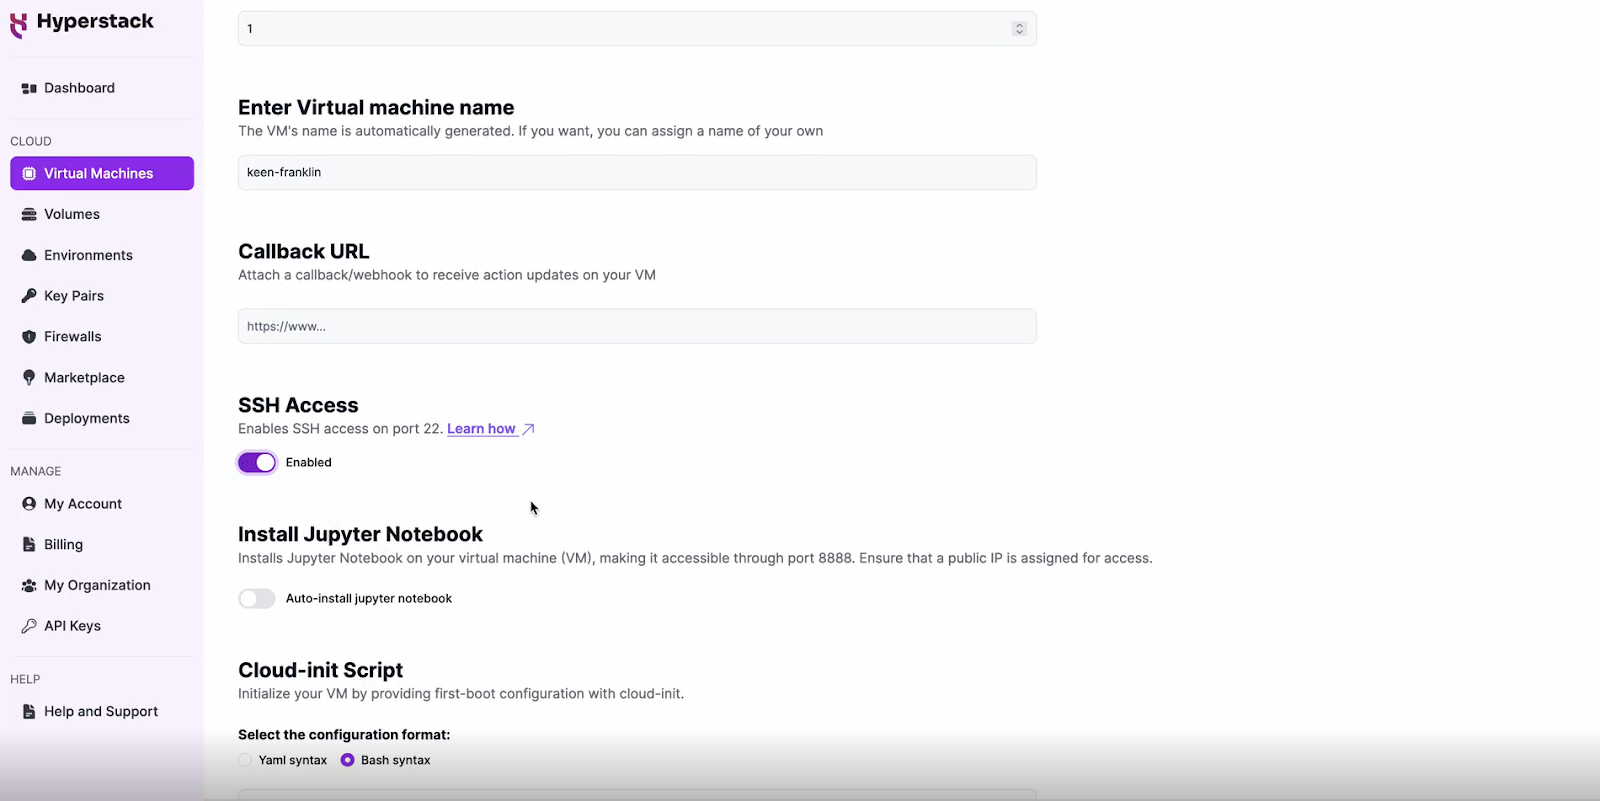
Configure Additional Settings
- Look for an "Additional Settings" or "Advanced Options" section.
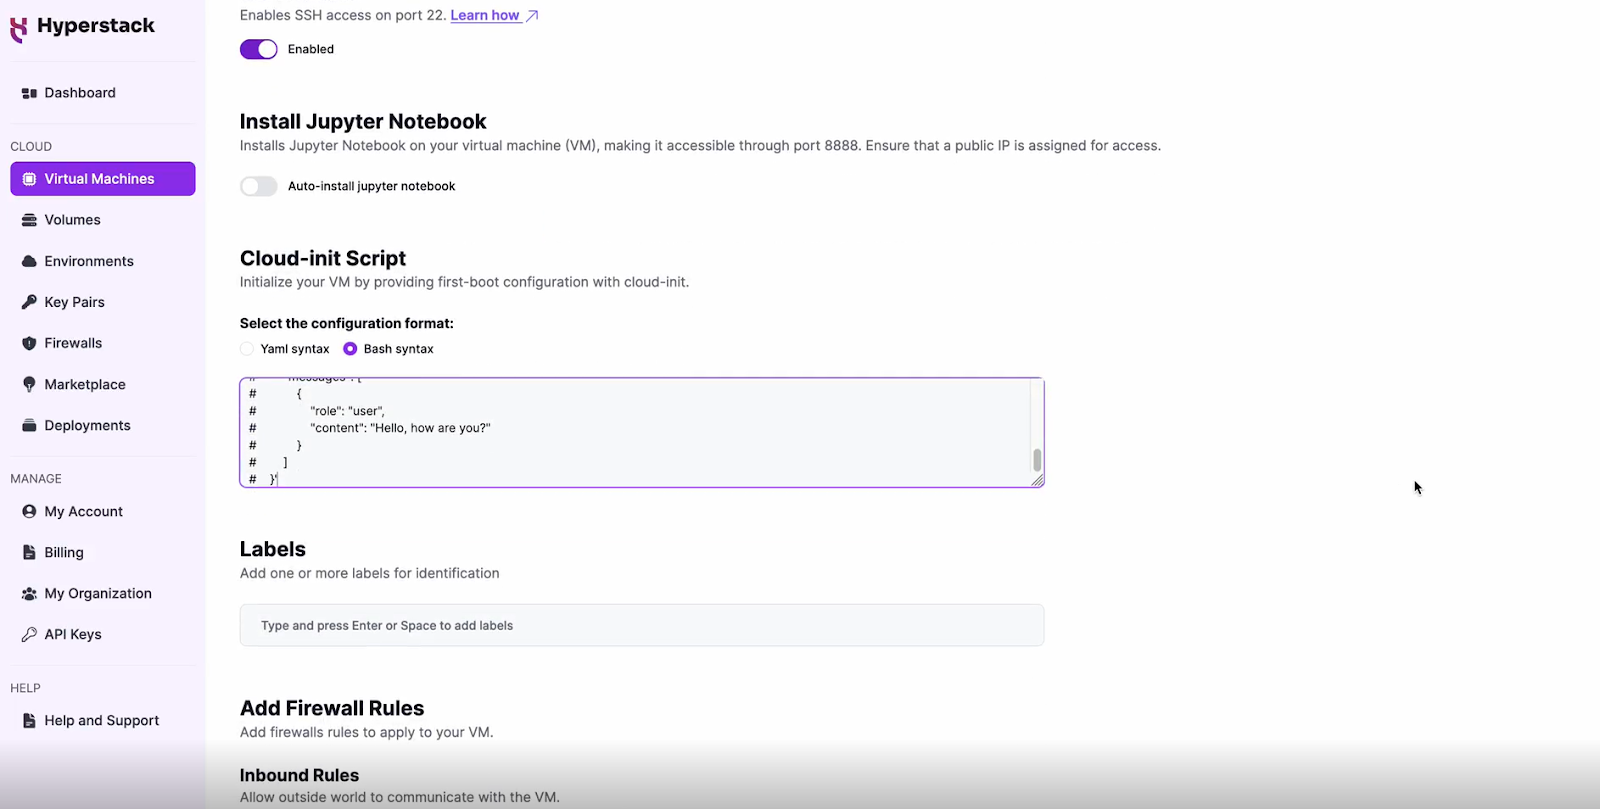
- Here, you'll find a field for cloud-init scripts. This is where you'll paste the initialisation script. Click here to get the cloud-init script!
- Ensure the script is in bash syntax. This script will automate the setup of your Llama3-70B environment.
Please note: The above script deploys the NousResearch version of Llama-3-70B. This allows you to get started with Llama-3-70B without a HuggingFace account and HuggingFace token. If you want to use the original model by meta, please have a look at the comments in the cloud-init script.
Review and Deploy
- Double-check all your settings.
- Click the "Deploy" button to launch your virtual machine.
Step 3: Initialisation and Setup
After deploying your VM, the cloud-init script will begin its work. This process typically takes about 7 minutes. During this time, the script performs several crucial tasks:
- Dependencies Installation: Installs all necessary libraries and tools required to run Llama3-70B.
- Model Download: Fetches the Llama3-70B model files from the specified repository.
- API Setup: Configures the vLLM engine and sets up an OpenAI-compatible API endpoint on port 8000.
While waiting, you can prepare your local environment for SSH access and familiarise yourself with the Hyperstack dashboard.
Step 4: Accessing Your VM
Once the initialisation is complete, you can access your VM:
Locate SSH Details
- In the Hyperstack dashboard, find your VM's details.
- Look for the public IP address, which you will need to connect to your VM with SSH.
Connect via SSH
- Open a terminal on your local machine.
- Use the command ssh -i [path_to_ssh_key] [os_username]@[vm_ip_address] (e.g: ssh -i /users/username/downloads/keypair_hyperstack ubuntu@0.0.0.0.0)
- Replace username and ip_address with the details provided by Hyperstack.
Interacting with Llama3-70B
To access and experiment with Meta's latest model, SSH into your machine after completing the setup. If you are having trouble connecting with SSH, watch our recent platform tour video (at 4:08) for a demo. Once connected, use this API call on your machine to start using the Llama3-70B model.
MODEL_NAME="NousResearch/Meta-Llama-3-70B-Instruct"
curl -X POST http://localhost:8000/v1/chat/completions \
    -H "Content-Type: application/json" \
    -d '{
        "model": "'$MODEL_NAME'",
        "messages": [
            {
                "role": "user",
                "content": "Hello, how are you?"
            }
        ]
    }'
Step 5: Hibernating Your VM
When you're finished with your current workload, you can hibernate your VM to avoid incurring unnecessary costs:
- In the Hyperstack dashboard, locate your VM instance.
- Look for a "Hibernate" option.
- Click to hibernate the VM, which will stop billing for compute resources while preserving your setup.
To continue your work without repeating the setup process:
- Return to the Hyperstack dashboard and find your hibernated VM.
- Select the "Resume" or "Start" option.
- Wait a few moments for the VM to become active.
- Reconnect via SSH using the same credentials as before.
Additional Resources
Want to continue your AI journey on Hyperstack? Check out our latest tutorials here:
Subscribe to Hyperstack!
Enter your email to get updates to your inbox every week

