

TABLE OF CONTENTS
NVIDIA H100 GPUs On-Demand
Deploying advanced AI models like FLUX.1 on Hyperstack provides the perfect environment for running large-scale, high-performance applications. This guide will walk you through the process of deploying the FLUX.1 model, specifically focusing on the ''schnell' variant, which is optimised for speed. For those seeking higher-quality outputs, we'll also cover how to access the dev variant by modifying the deployment process.
Now, let's walk through the step-by-step process of deploying FLUX.1 on Hyperstack.
Step 1: Accessing Hyperstack
- Visit the Hyperstack website and log in to your account.
- If you don't already have an account, you'll need to create one and set up your billing information. Check our documentation to get started with Hyperstack.
- Once logged in, you'll enter the Hyperstack dashboard, which provides an overview of your resources and deployments.
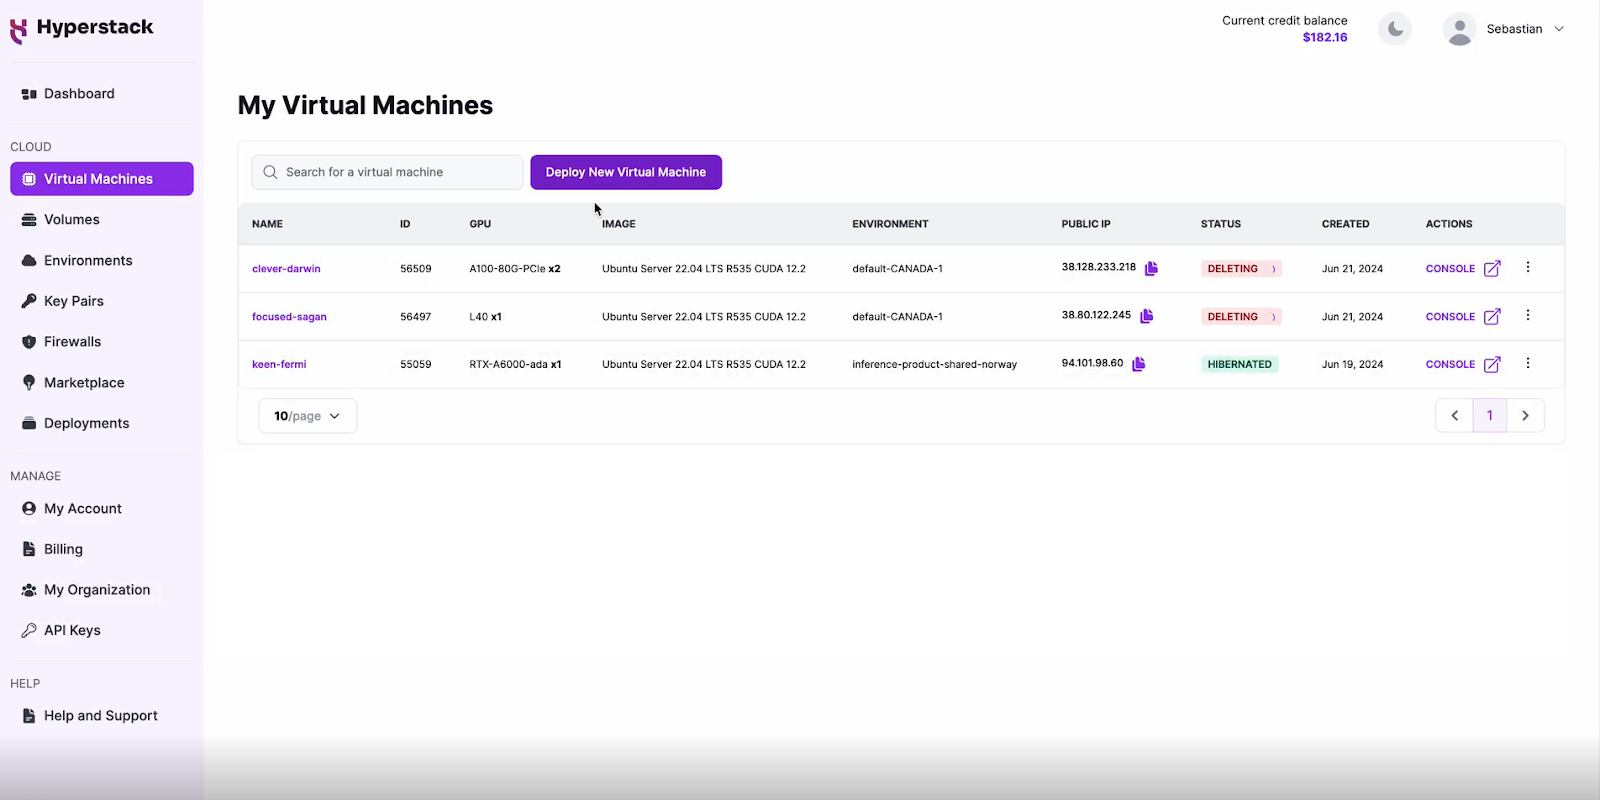
Step 2: Deploying a New Virtual Machine
Initiate Deployment
- Navigate to the "Virtual Machines" section and click "Deploy New Virtual Machine."
- Click it to start the deployment process.
Select Hardware Configuration
- In the hardware options, choose the H100-PCIe GPU configuration for optimal performance. This configuration ensures that your deployment will handle the FLUX.1 model efficiently, even for high-demand tasks.
%5B1%5D.png)
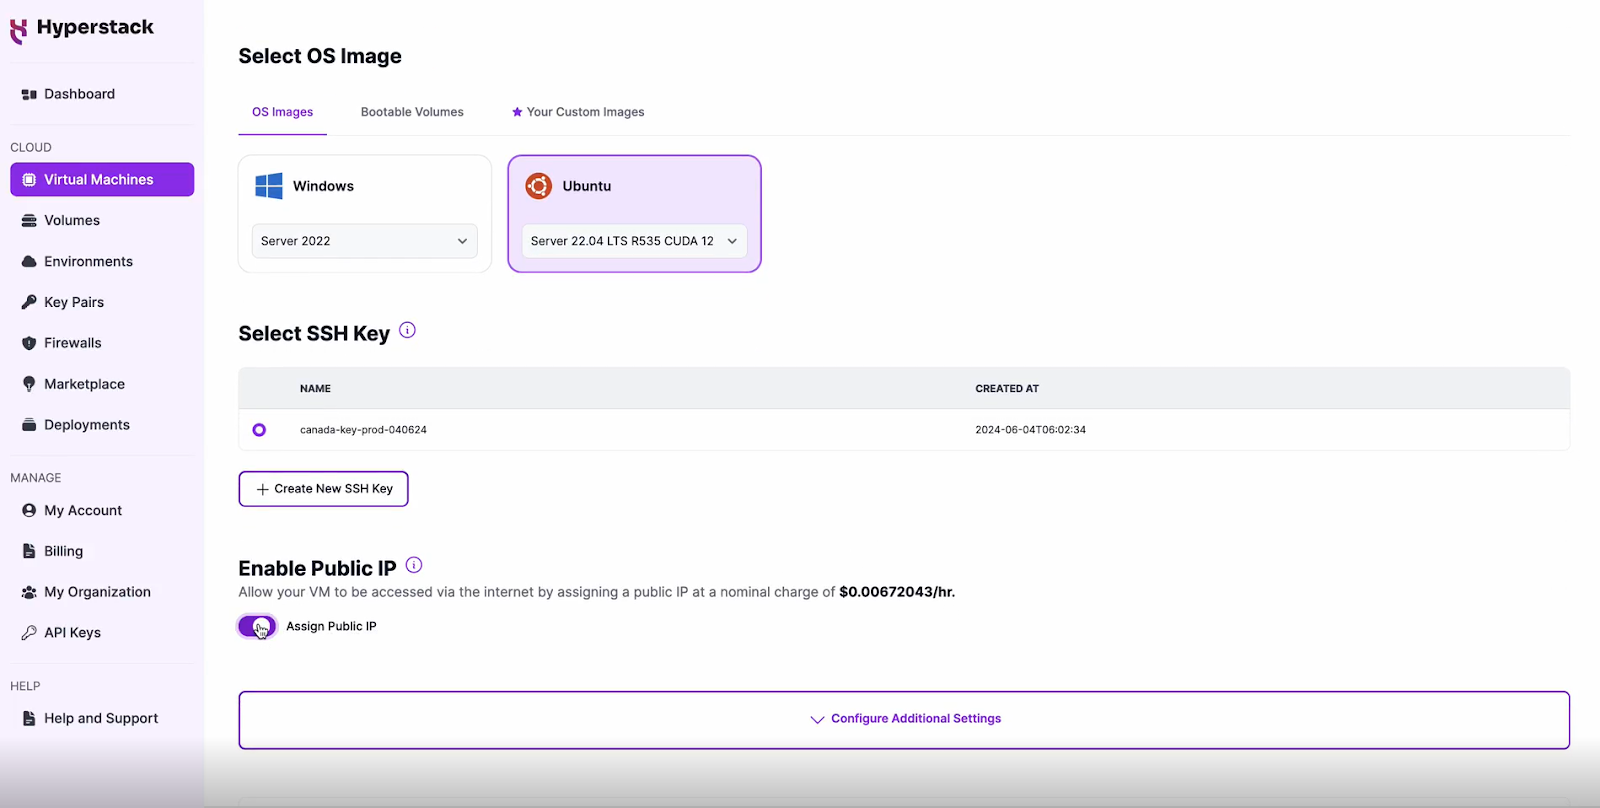
Choose the Operating System
- Select the "Server 22.04 LTS R535 CUDA 12.2".
- This image comes pre-installed with Ubuntu 22.04 LTS and NVIDIA drivers (R535) along with CUDA 12.2, providing an optimised environment for AI workloads.

Select a Keypair
- Select one of the keypairs in your account. Don't have a keypair yet? See our Getting Started tutorial for creating one.
Network Configuration
- Ensure you assign a Public IP to your Virtual machine.
- This allows you to access your VM from the internet, which is crucial for remote management and API access.
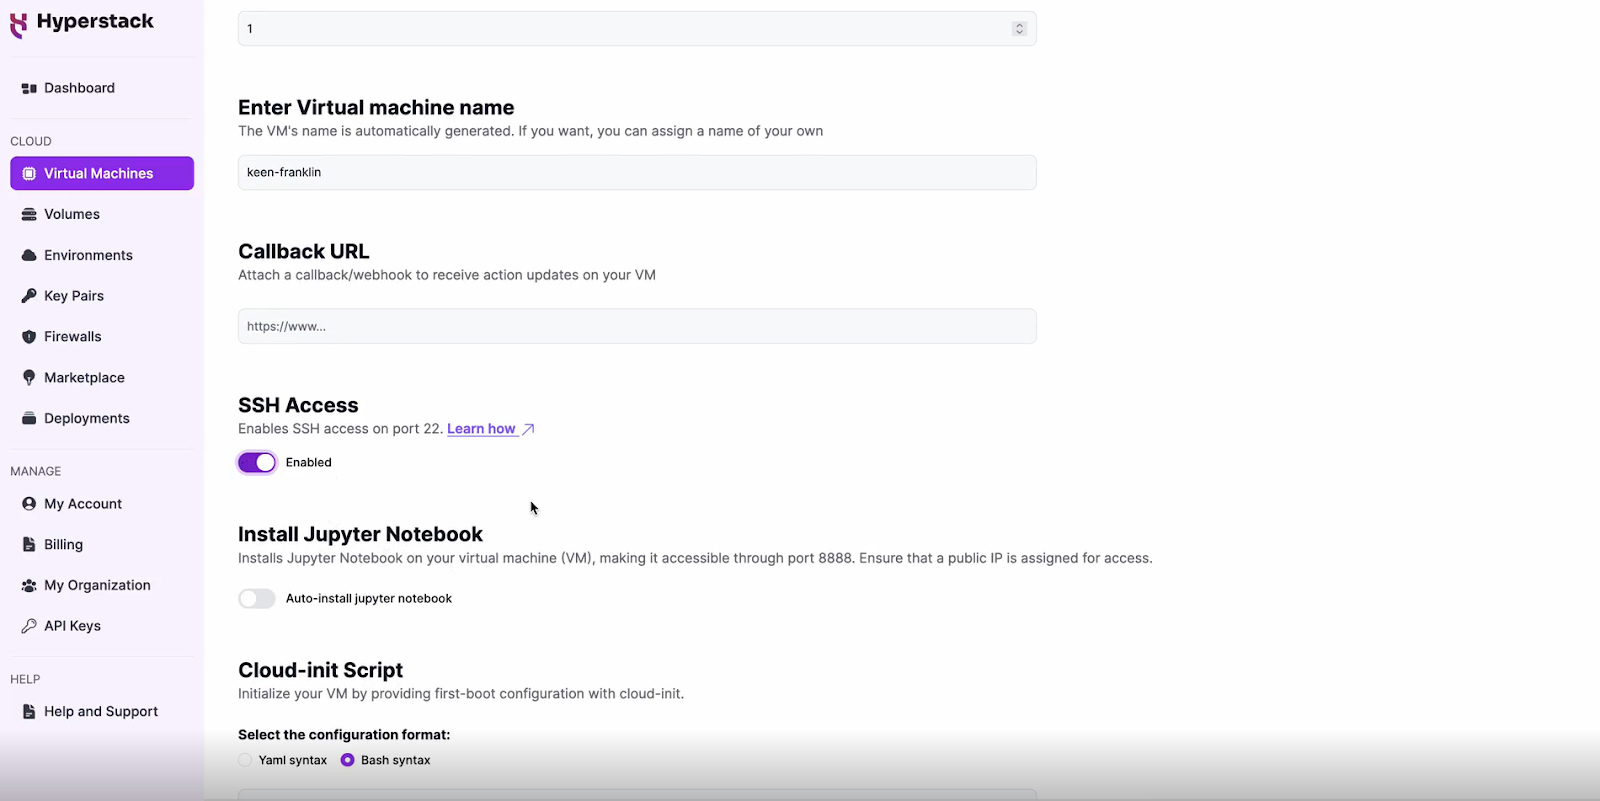
Enable SSH Access
- Make sure to enable an SSH connection.
- You'll need this to securely connect and manage your VM.
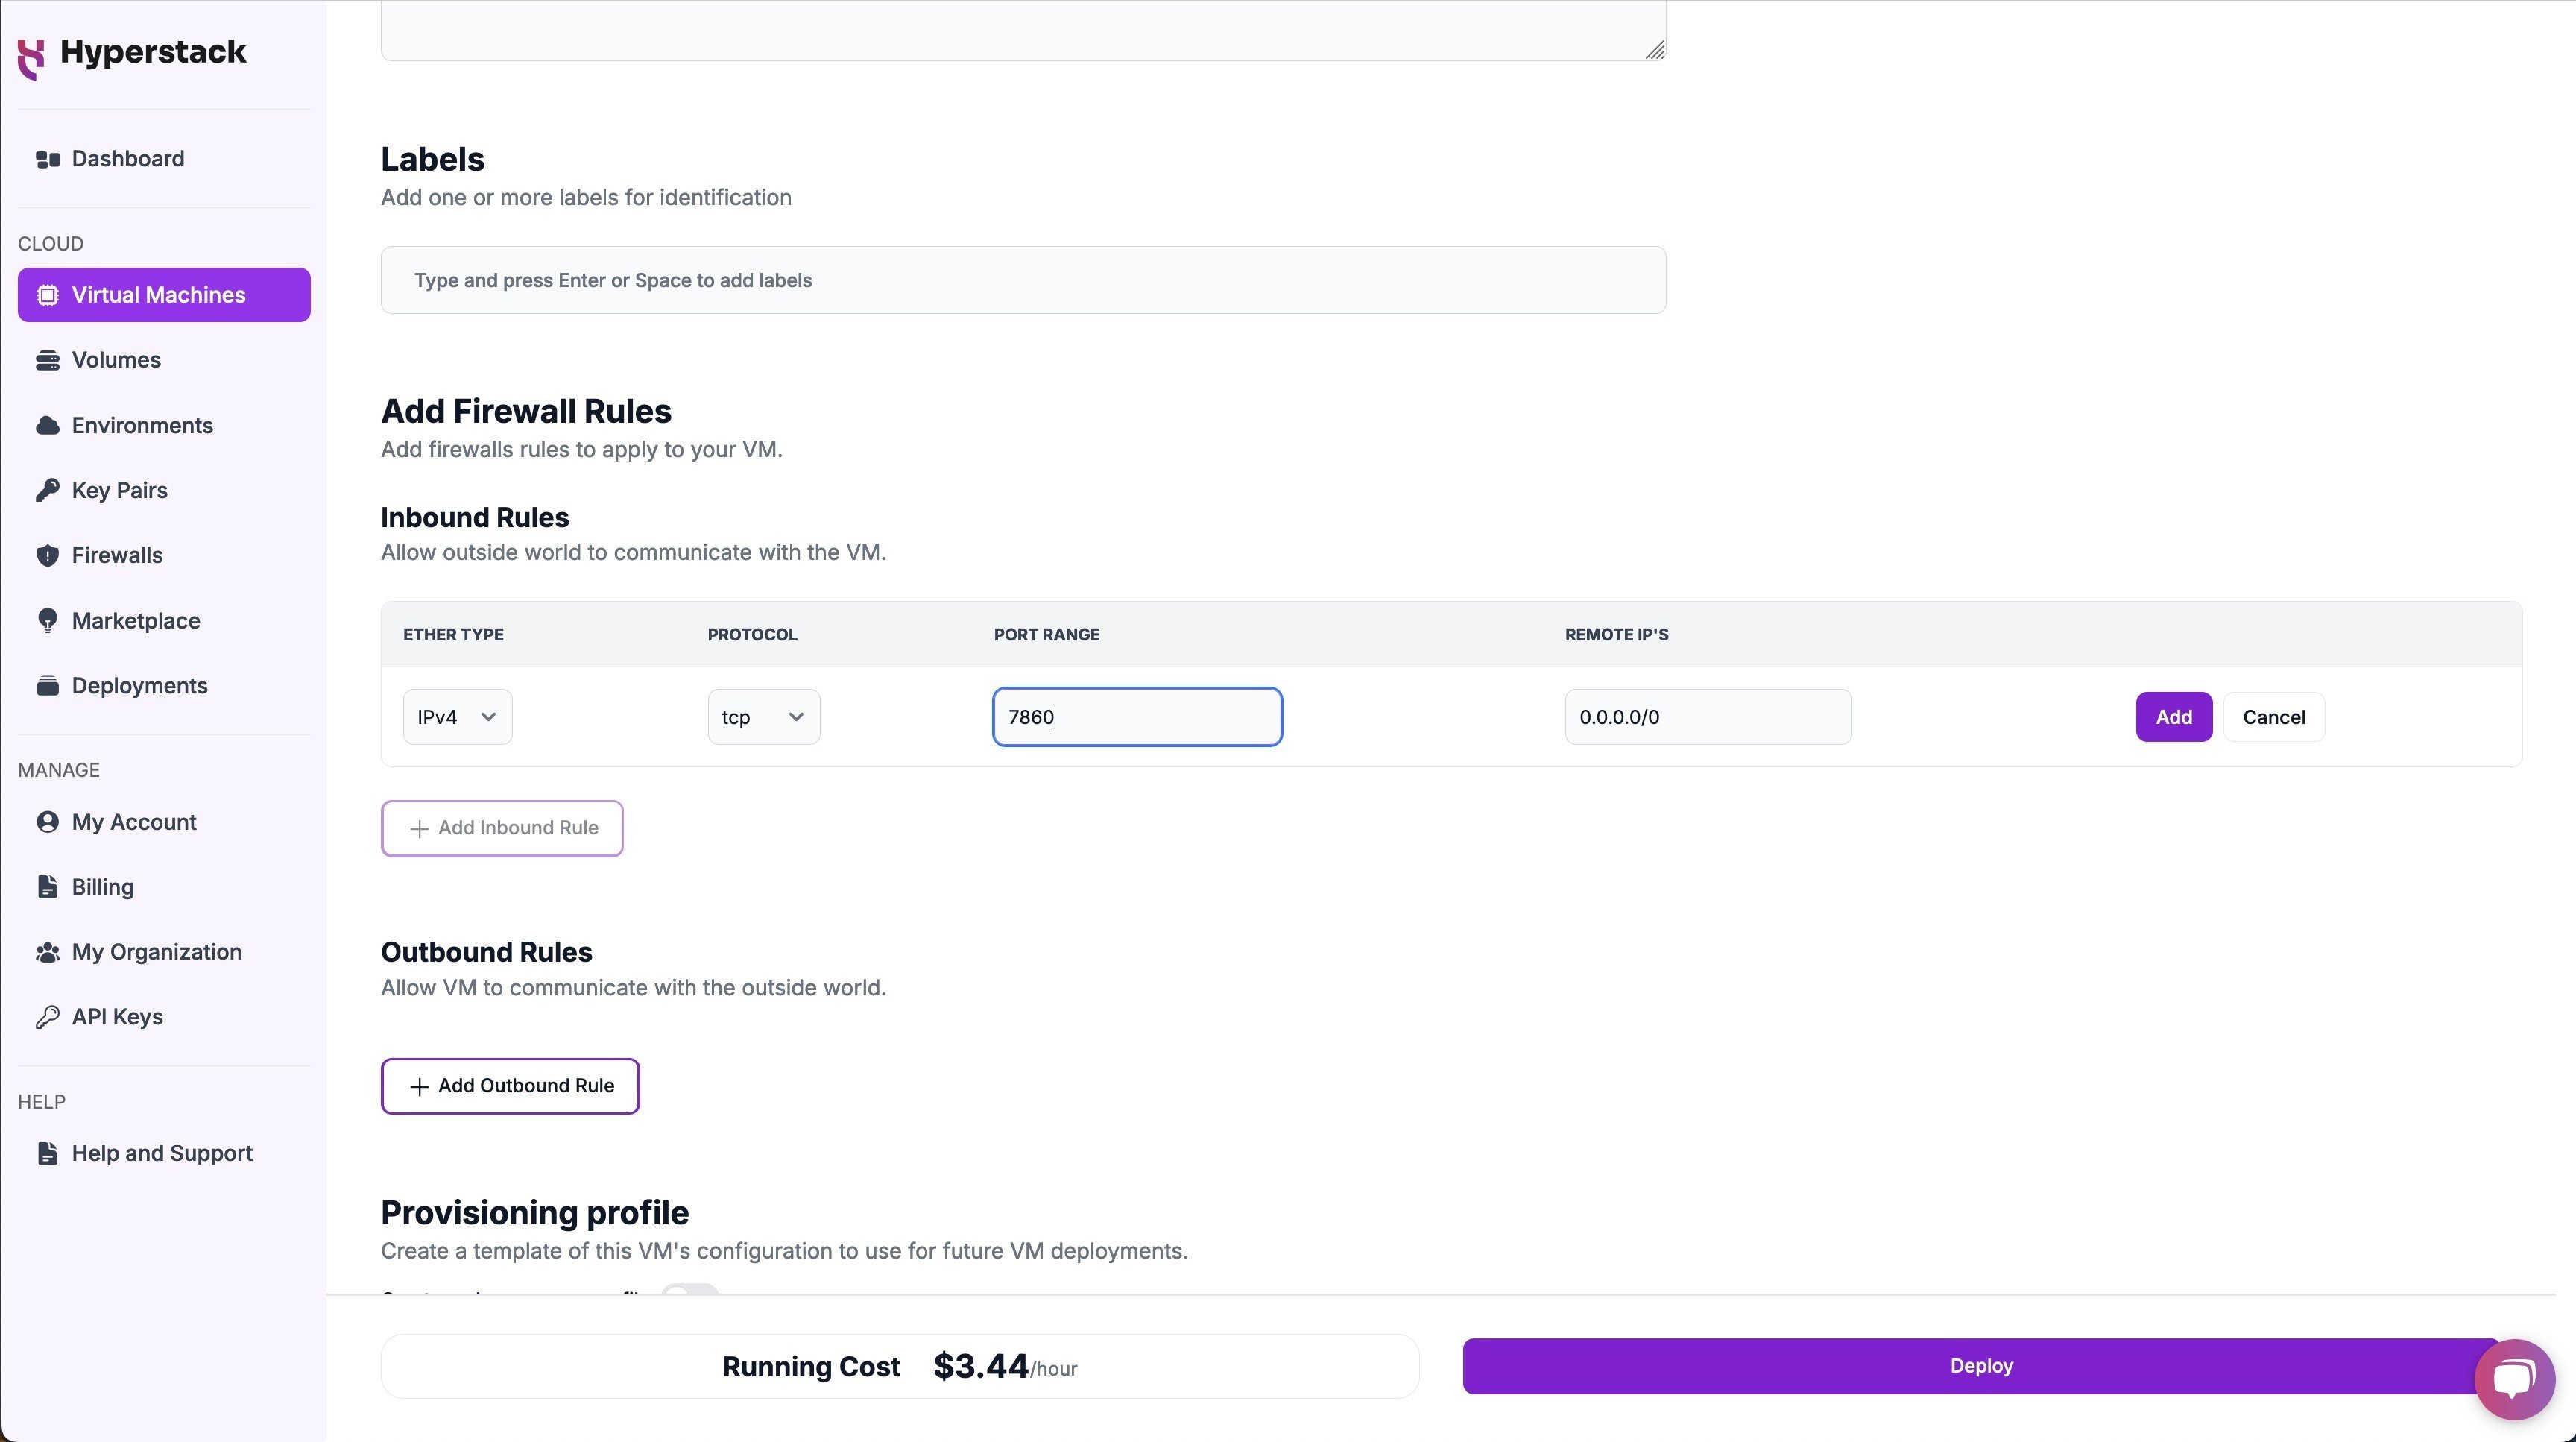
Add Firewall Rules
- Open port "7680" to allow incoming traffic on this port. This port will be used to interact with the FLUX.1 model via the Gradio demo.
Please note: This will open your port to the public internet, allowing anyone with the public IP address and port number to access the dashboard. In case you don't want this, please refer to the section below at "Interacting with Flux.1"
Configure Additional Settings
- Look for the "Configure Additional Settings" section and click on it.
- Here, you'll find a field for cloud-init scripts. Use the provided cloud-init script for deployment and ensure it is in bash syntax. This script is pre-configured to deploy the "schnell" model by default, which is optimised for speed. Click here to get the cloud-init script!
- If you want to request access to the gated Dev model on HuggingFace (see screenshot below)
FLUX_MODEL_NAME="flux-schnell"
# FLUX_MODEL_NAME="flux-dev"
# HF_TOKEN="[insert HuggingFace token]"
Review and Deploy the Script
- Double-check all your settings.
- Paste the cloud-init script into the initialisation section when deploying your VM. The script will automatically install the necessary dependencies, clone the FLUX repository, and set up the environment.
- Click the "Deploy" button to launch your virtual machine.
Step 3: Setting Up the FLUX.1 Model
- After deploying your VM, the cloud-init script will begin its work. This process should take about 5-10 minutes.
Step 4: Accessing Your VM
Once the initialisation is complete, you can access your VM:
Locate SSH Details
- In the Hyperstack dashboard, find your VM's details.
- Look for the public IP address, which you will need to connect to your VM with SSH.
Connect via SSH
- Open a terminal on your local machine.
- Use the command ssh -i [path_to_ssh_key] [os_username]@[vm_ip_address] (e.g: ssh -i /users/username/downloads/keypair_hyperstack ubuntu@0.0.0.0.0)
- Replace username and ip_address with the details provided by Hyperstack.
Interacting with Flux.1
Once the deployment is complete, access the Gradio demo interface by navigating to [public-ip]:7860 in your web browser.
Please note: This link will be accessible to anyone with the link. To restrict access, you can disable the Public IP and use SSH port forwarding instead.
- Disable public-ip
- Use SSH port forwarding together with your keypair, with this command:
ssh -i [path_to_ssh_key] -L 7860:localhost:7860 [os_username]@[vm_ip_address] # e.g: ssh -i /users/username/downloads/keypair_hyperstack -L 7860:localhost:7860 ubuntu@0.0.0.0 - After running the above command, go to
localhost:7860in your browser to access the demo.
Step 5: Hibernating Your VM
When you're finished with your current workload, you can hibernate your VM to avoid incurring unnecessary costs:
- In the Hyperstack dashboard, locate your Virtual machine.
- Look for a "Hibernate" option.
- Click to hibernate the VM, which will stop billing for compute resources while preserving your setup.
To continue your work without repeating the setup process:
- Return to the Hyperstack dashboard and find your hibernated VM.
- Select the "Resume" or "Start" option.
- Wait a few moments for the VM to become active.
- Reconnect via SSH using the same credentials as before.
Explore our latest tutorials:
Subscribe to Hyperstack!
Enter your email to get updates to your inbox every week

