

TABLE OF CONTENTS
NVIDIA A100 GPUs On-Demand
The buzz around Llama 3.1 is not over yet as NVIDIA recently released its fine-tuned Llama 3.1 Nemotron-70B-Instruct model. The model beat GPT-4o and Claude 3.5 Sonnet across key benchmarks. What’s more interesting is that the fine-tuned model can solve the strawberry problem without specialised prompting or additional reasoning tokens. For those working with models that struggle with coherence and reasoning, fine-tuning them on Hyperstack can significantly elevate your LLM performance.
Want to get started with the latest NVIDIA model? Check out our quick guide below to deploying and using the Llama 3.1 Nemotron-70B-Instruct model on Hyperstack.
Why Deploy on Hyperstack?
Hyperstack is a cloud platform designed to accelerate AI and machine learning workloads. Here's why it's an excellent choice for deploying Llama-3.1-Nemotron-70B-Instruct:
- Availability: Hyperstack provides access to the latest and most powerful GPUs such as the NVIDIA A100 and the NVIDIA H100 SXM on-demand, specifically designed to handle large language models.
- Ease of Deployment: With pre-configured environments and one-click deployments, setting up complex AI models becomes significantly simpler on our platform.
- Scalability: You can easily scale your resources up or down based on your computational needs.
- Cost-Effectiveness: You pay only for the resources you use with our cost-effective cloud GPU pricing.
- Integration Capabilities: Hyperstack provides easy integration with popular AI frameworks and tools.
Deployment Process
Now, let's walk through the step-by-step process of deploying Llama-3.1-Nemotron-70B-Instruct on Hyperstack.
Step 1: Accessing Hyperstack
- Go to the Hyperstack website and log in to your account.
- If you're new to Hyperstack, you'll need to create an account and set up your billing information. Check our documentation to get started with Hyperstack.
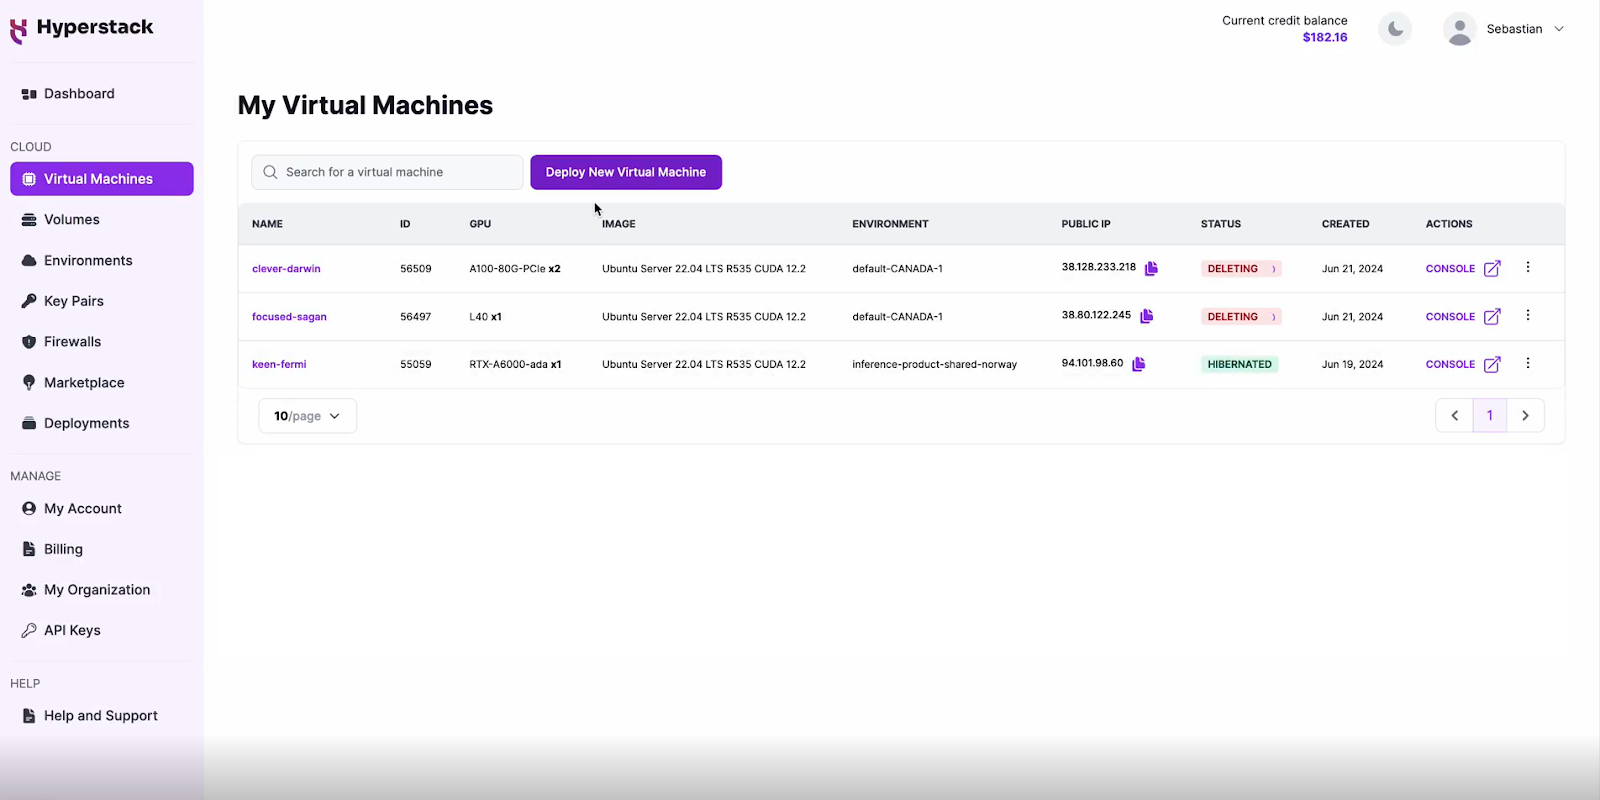
- Once logged in, you'll be greeted by the Hyperstack dashboard, which provides an overview of your resources and deployments.
Step 2: Deploying a New Virtual Machine
Initiate Deployment
- Look for the "Deploy New Virtual Machine" button on the dashboard.
- Click it to start the deployment process.
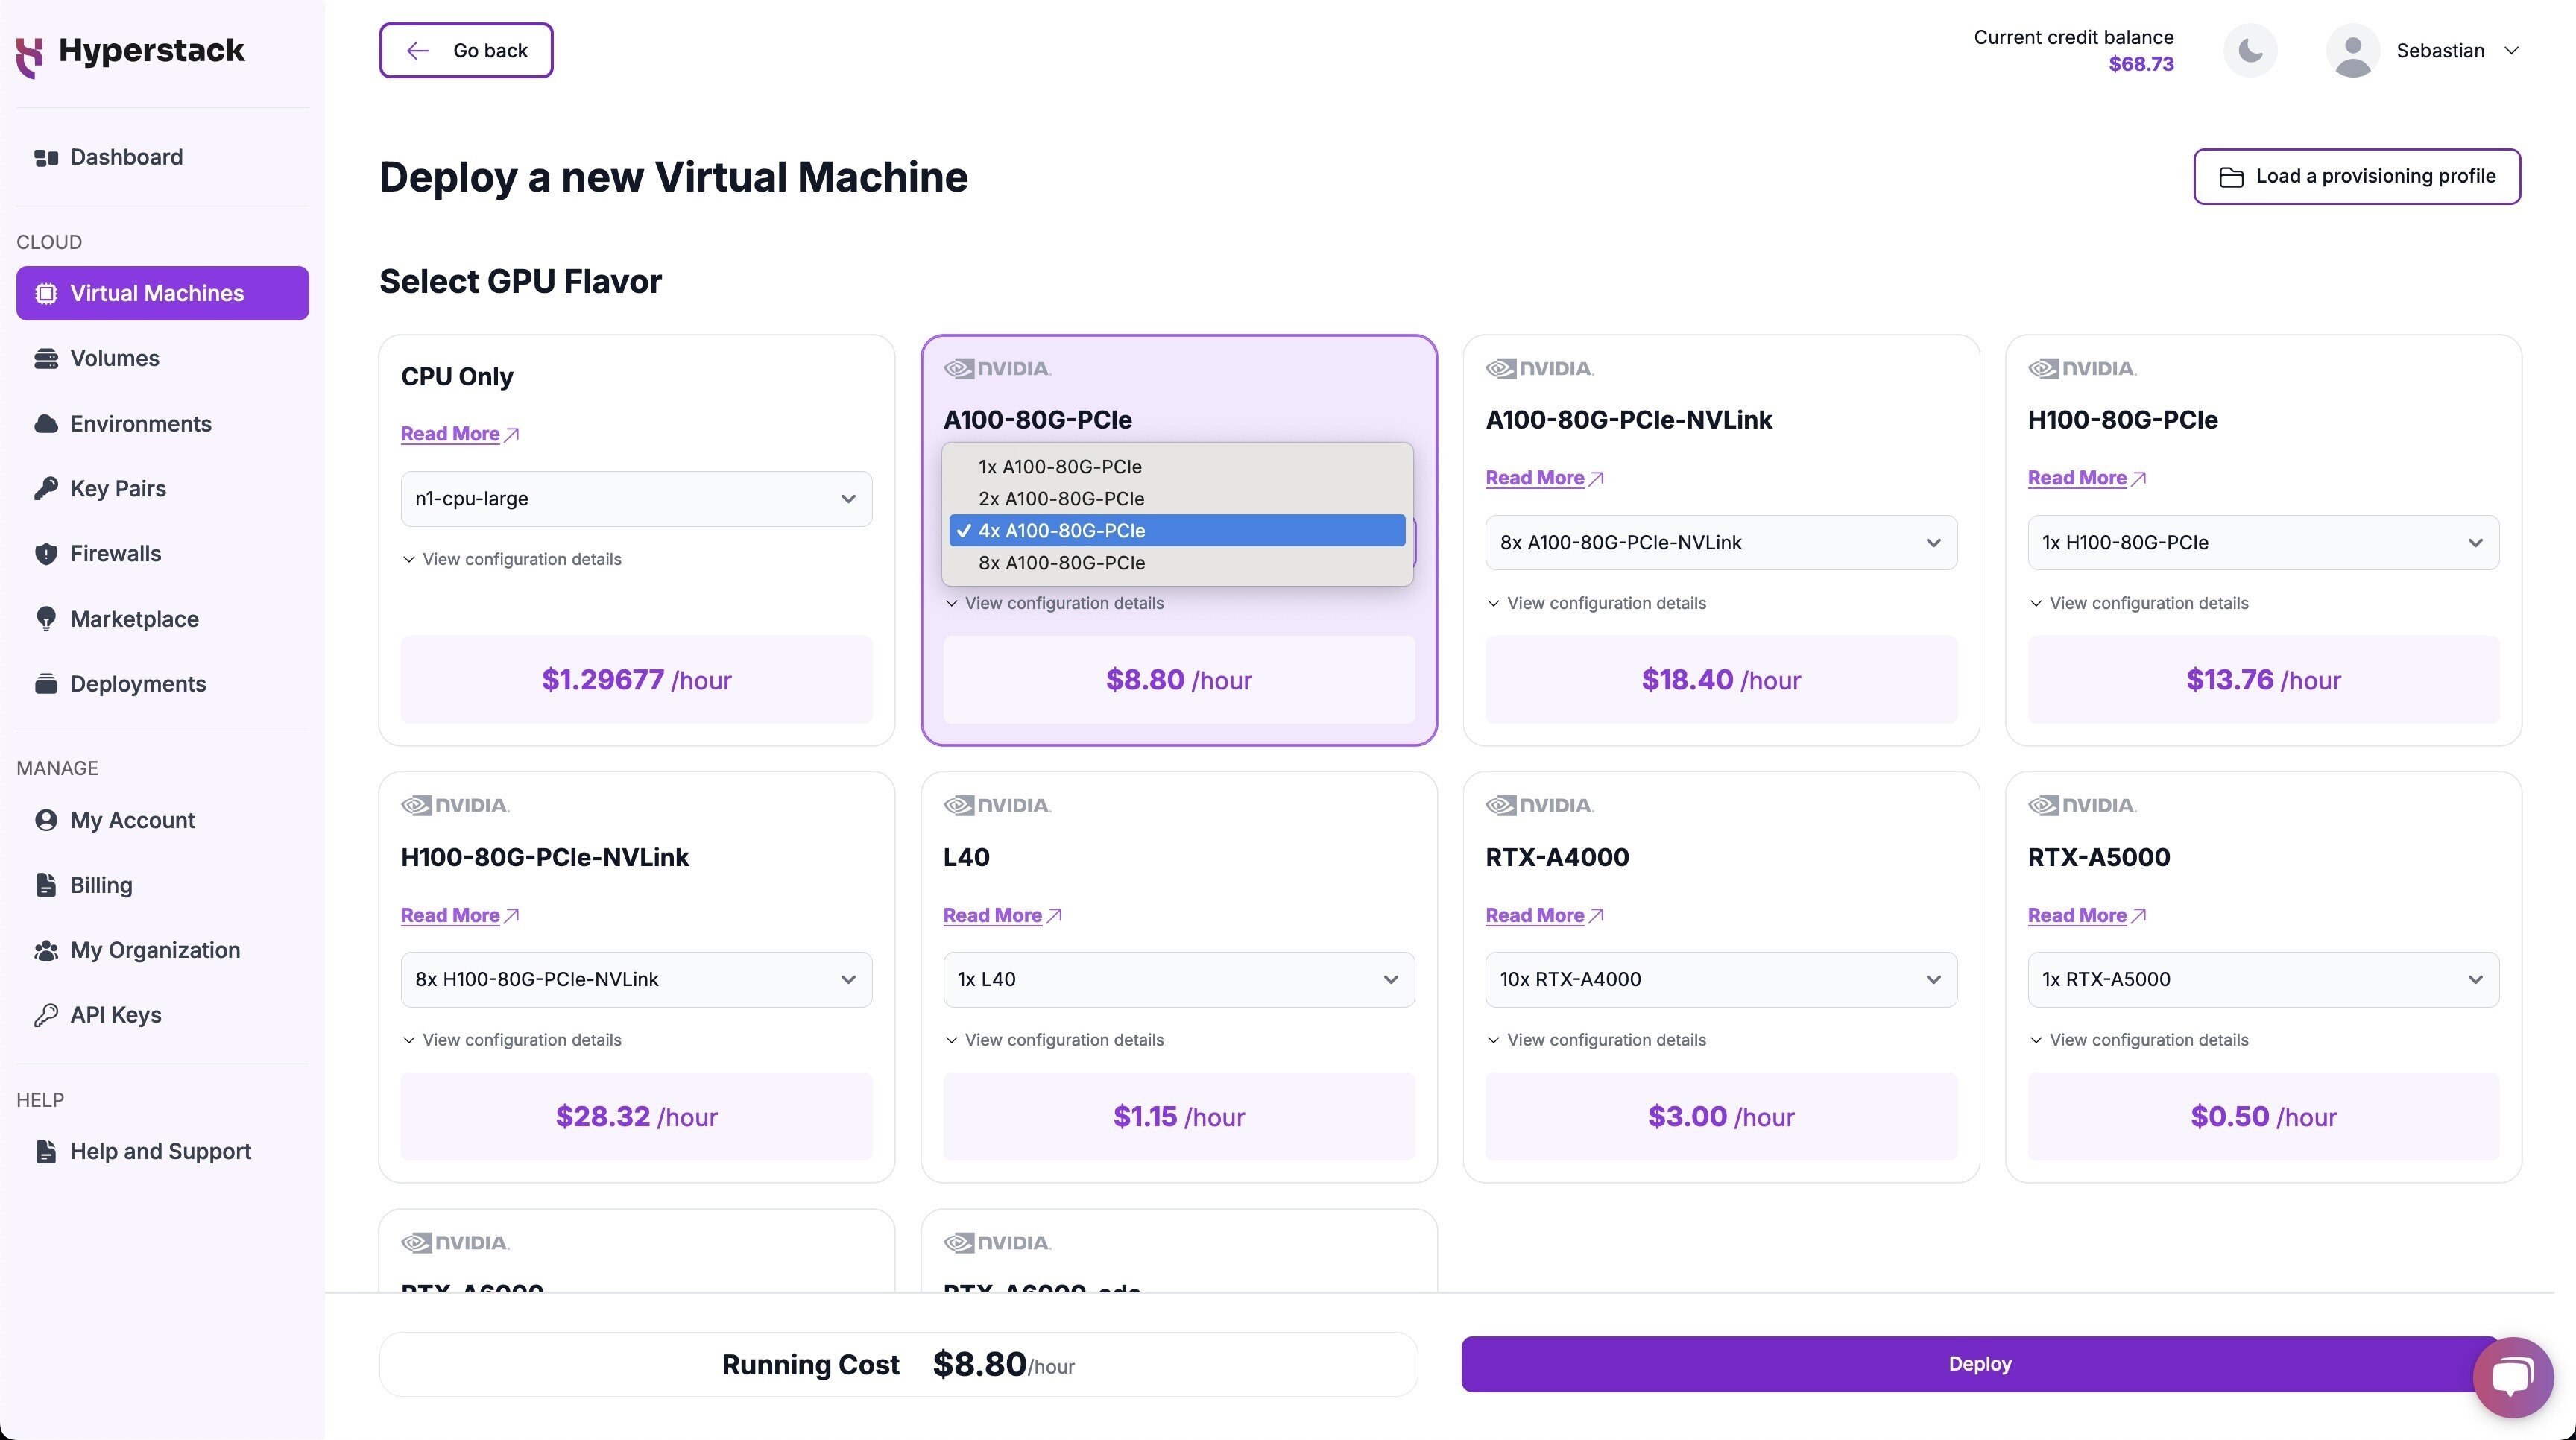
Select Hardware Configuration
- In the hardware options, choose the "4xA100-80G-PCIe" flavour.
- This configuration provides 4 NVIDIA A100 GPUs with 80GB memory each, connected via PCIe, offering exceptional performance for running Llama-3.1-Nemotron-70B.
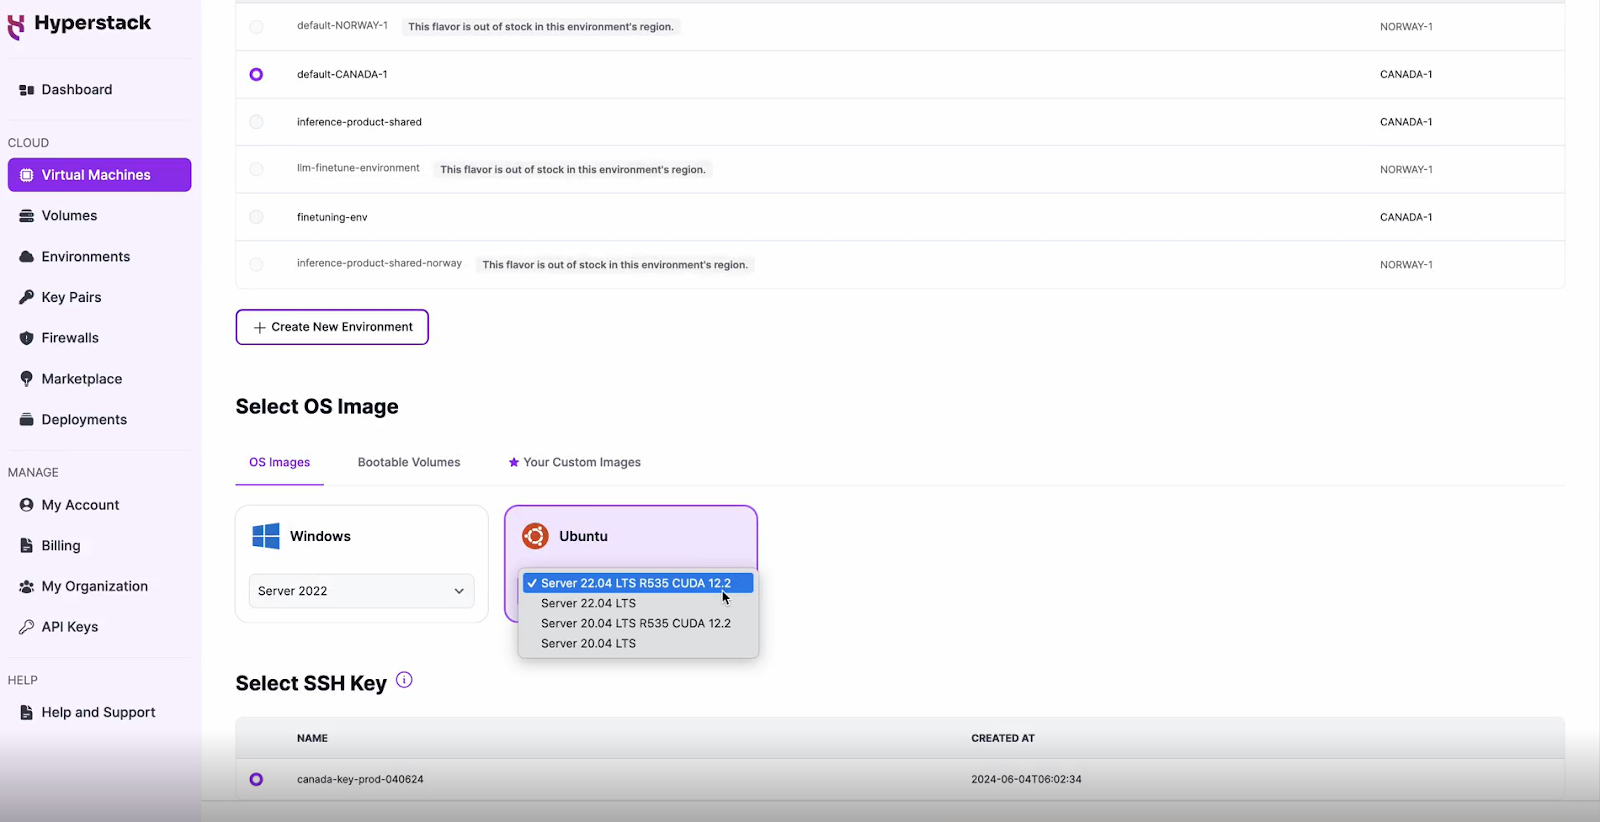
Choose the Operating System
- Select the "Server 22.04 LTS R535 CUDA 12.2".
- This image comes pre-installed with Ubuntu 22.04 LTS and NVIDIA drivers (R535) along with CUDA 12.2, providing an optimised environment for AI workloads.
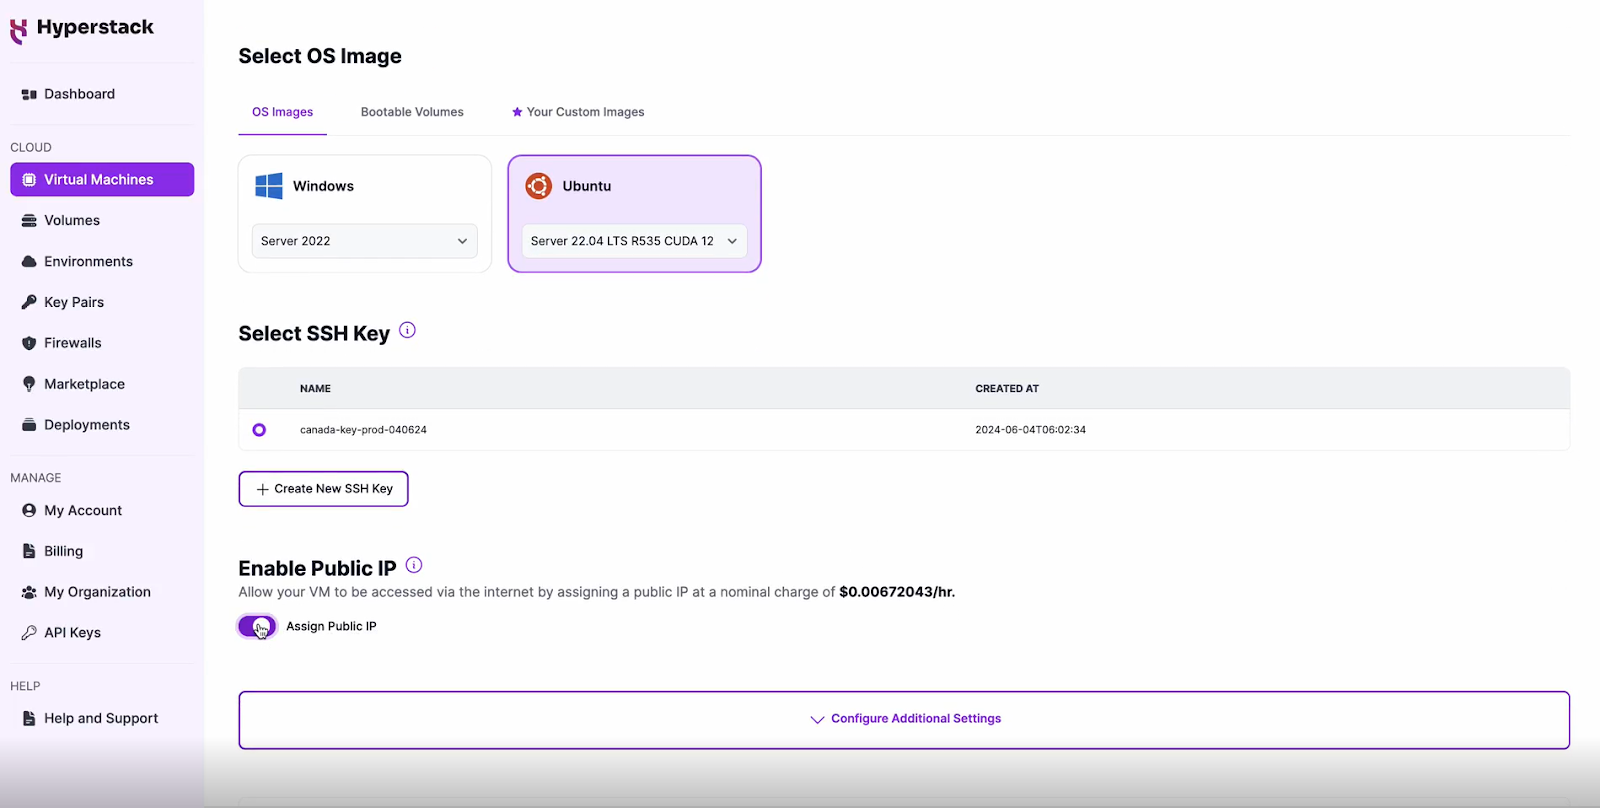
Select a keypair
- Select one of the keypairs in your account. Don't have a keypair yet? See our Getting Started tutorial for creating one.
Network Configuration
- Ensure you assign a Public IP to your Virtual machine.
- This allows you to access your VM from the internet, which is crucial for remote management and API access.
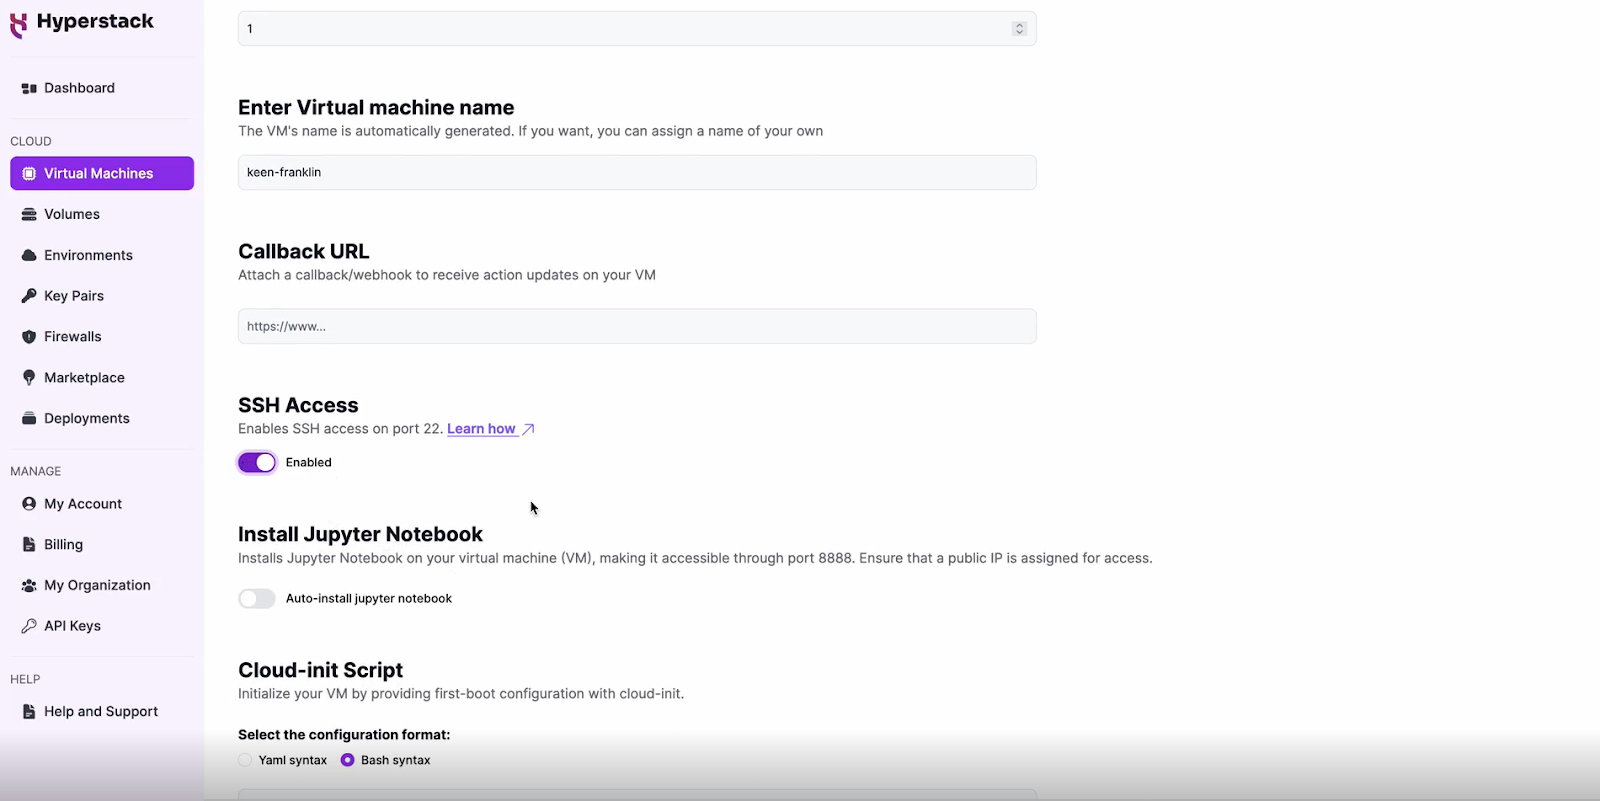
Enable SSH Access
- Make sure to enable an SSH connection.
- You'll need this to securely connect and manage your VM.
Review and Deploy
- Double-check all your settings.
- Click the "Deploy" button to launch your virtual machine.
Step 3: Accessing Your VM
Once the initialisation is complete, you can access your VM:
Locate SSH Details
- In the Hyperstack dashboard, find your VM's details.
- Look for the public IP address, which you will need to connect to your VM with SSH.
Connect via SSH
- Open a terminal on your local machine.
- Use the command ssh -i [path_to_ssh_key] [os_username]@[vm_ip_address] (e.g: ssh -i /users/username/downloads/keypair_hyperstack ubuntu@0.0.0.0.0)
- Replace username and ip_address with the details provided by Hyperstack.
Step 4: Running LLama-3.1-Nemotron-70B-instruct
- After connecting with SSH, we will set up the LLM.
- Run the following command inside the VM:
# Create models directory to ensure enough space
mkdir -p /ephemeral/models

# Download and install ollama
curl -fsSL https://ollama.com/install.sh | sh

# Set ollama models path
sudo cat < /etc/systemd/system/ollama.service.d/override.conf
[Service]
Environment="OLLAMA_HOST=0.0.0.0"
Environment="OLLAMA_MODELS=/ephemeral/models"
EOF

# Enable access for ollama
sudo chown -R ollama:ollama /ephemeral/models

# Reload ollama to apply changes
sudo systemctl daemon-reload
sudo systemctl restart ollama.service

# Pull and the model
ollama pull nemotron:70b-instruct-fp16
Interacting with Llama-3.1-Nemotron-70B-Instruct
To access and experiment with the LLM, SSH into your machine after completing the setup. If you are having trouble connecting with SSH, watch our recent platform tour video (at 4:08) for a demo. Once connected, use this API call on your machine to start using the Llama-3.1-Nemotron-70B-Instruct
# Talk to the model interactively
ollama run nemotron:70b-instruct-fp16

# Talk to the model via API
curl http://localhost:11434/api/chat -d '{
  "model": "nemotron:70b-instruct-fp16",
  "stream": false,
  "messages": [
    {
      "role": "user",
      "content": "How many letters R are there in strawberry?"
    }
  ]
}'
Step 5: Hibernating Your VM
When you're finished with your current workload, you can hibernate your VM to avoid incurring unnecessary costs:
- In the Hyperstack dashboard, locate your Virtual machine.
- Look for a "Hibernate" option.
- Click to hibernate the VM, which will stop billing for compute resources while preserving your setup.
To continue your work without repeating the setup process:
- Return to the Hyperstack dashboard and find your hibernated VM.
- Select the "Resume" or "Start" option.
- Wait a few moments for the VM to become active.
- Reconnect via SSH using the same credentials as before.
Explore our tutorial on Deploying and Using Notebook Llama on Hyperstack.
Subscribe to Hyperstack!
Enter your email to get updates to your inbox every week

